I bought her over a year ago. She was one of three beautiful Jacobean pieces built somewhere around 1940.
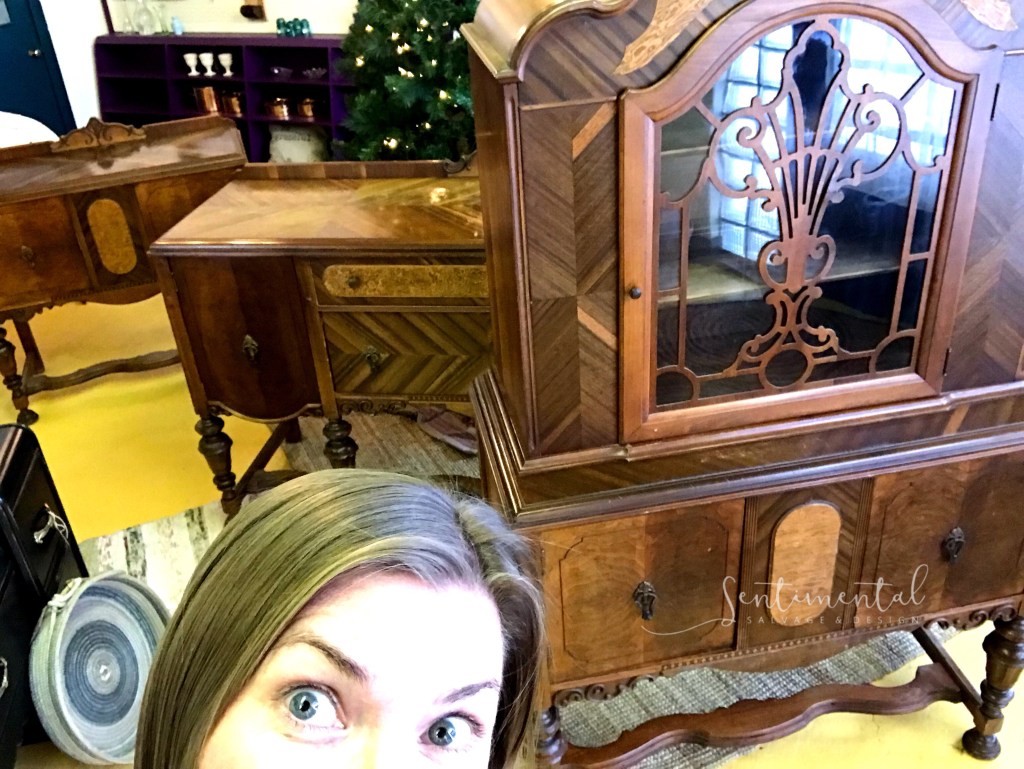
I knew I wanted to paint her in a way that complimented her curves and her wooden scrollwork in her door. I just wasn’t exactly sure what colours. Greens? Blues? Warm greys? This is always the hardest part – deciding on colours.
I started out by giving her a really good bath and removing the glass and beautiful wooden scrollwork. I then painted a base coat of a deep, dark turquoise by DIY Paint™ called Bohemian Blue.
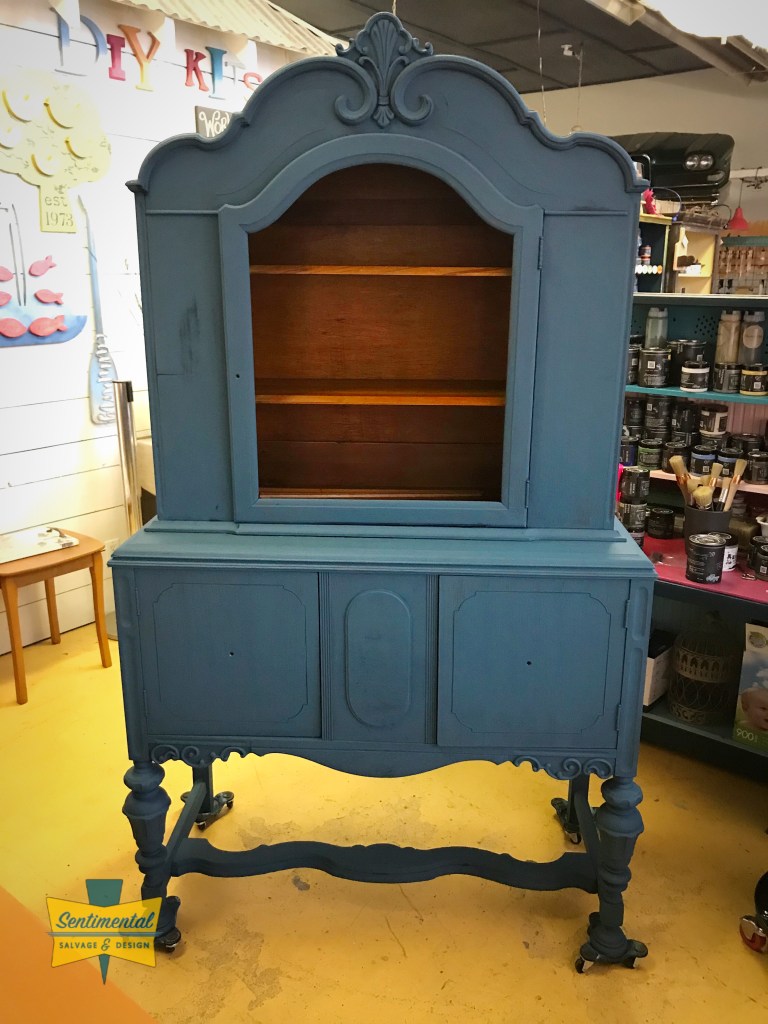
I knew she wasn’t going to be a solid colour (I rarely paint anything a single, solid colour) but I wasn’t exactly sure what other colour(s) to use yet – so she sat like this for weeks.
I used her as a demonstration piece in a Paint Blending 101 class, and then she sat again, neglected and basically ignored for another few weeks.
Until one day, I knew what I was going to do.
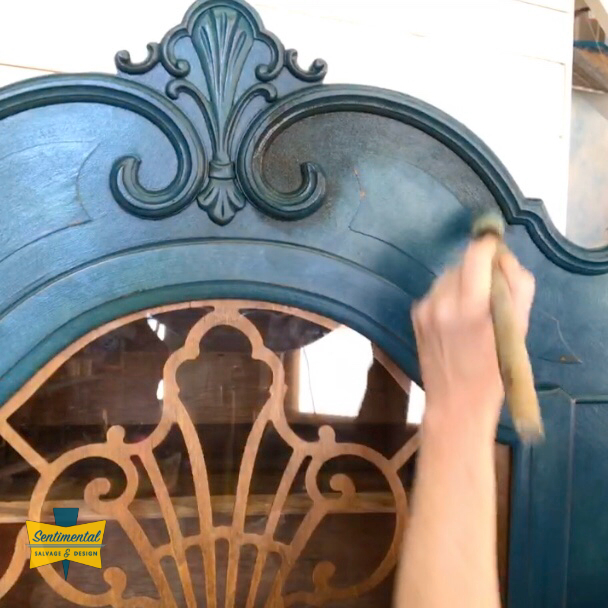
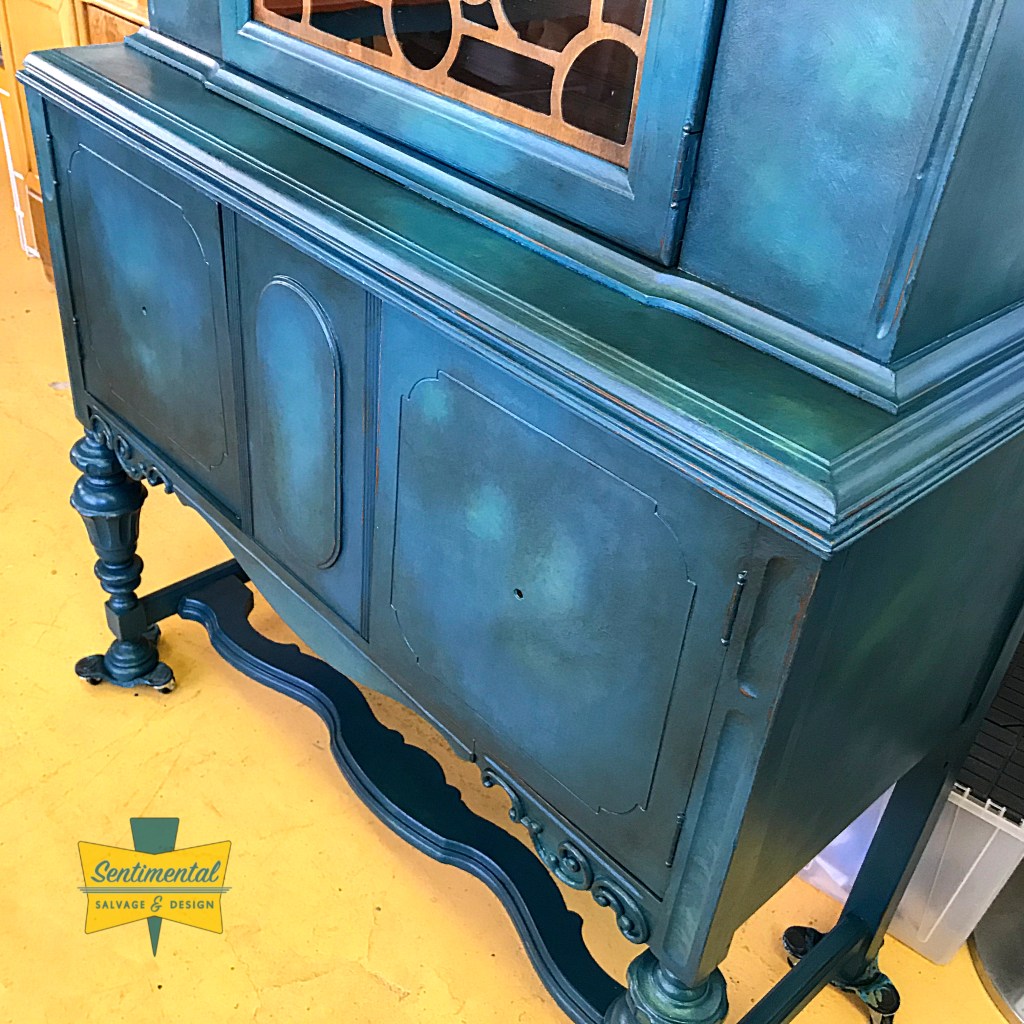
Usually, when I blend colours while painting, I work in vertical or horizontal brush strokes. For some reason, I started using a swirling technique on her and I liked it. I liked how it gave her some unique texture and the blend itself seemed to be more fitting to her style.
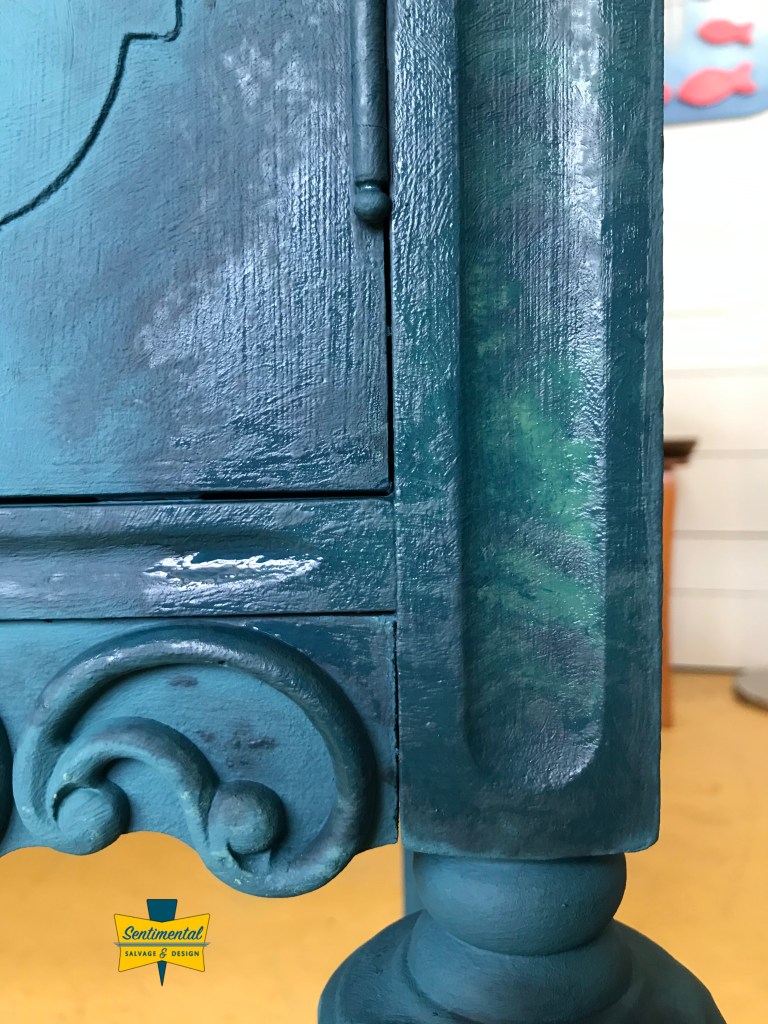
I used Fancy Farmgirl as the highlighting colour (one of my favourite greens) and it just seemed to work perfectly.
Alternating between the Bohemian Blue & Fancy Farmgirl in the swirling motions gave me the look I wanted. I was loving how she was starting to look.
I finished the entire piece in this way. Trying to highlight in the appropriate areas to accent her curves and compliment her design.
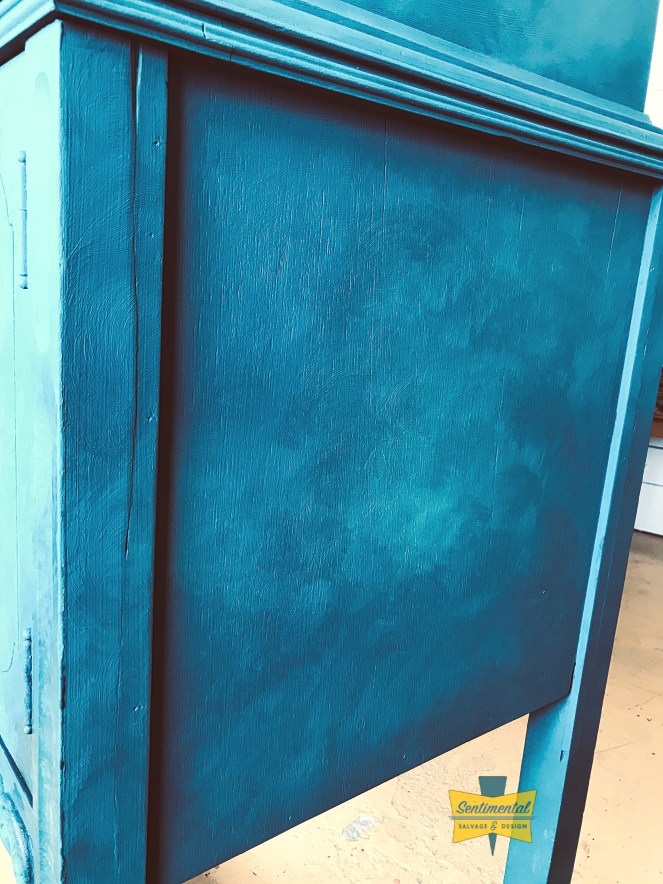
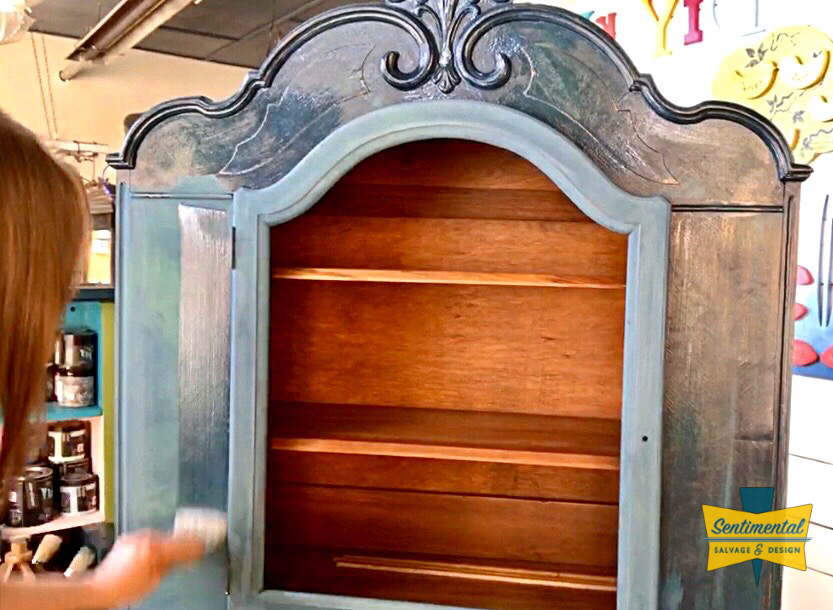
The next step was a full wet-distressing.
I wanted to have bits of her original wood colouring showing through the paint. The beautiful scrollwork in her glass door was being left original so I didn’t want that to seem out of place. I didn’t distress too much, just on edges and details as things would naturally wear over time.
Wet distressing leaves the paint looking super chalky. This is fine as when you seal it, the rich colour pigments in DIY Paint™ show up again beautifully.
I then sealed the paint using Big Top clear coat. This step had two purposes… one to seal the paint and another to act as a bit of a buffer/protector between the paint and my next step – shading.
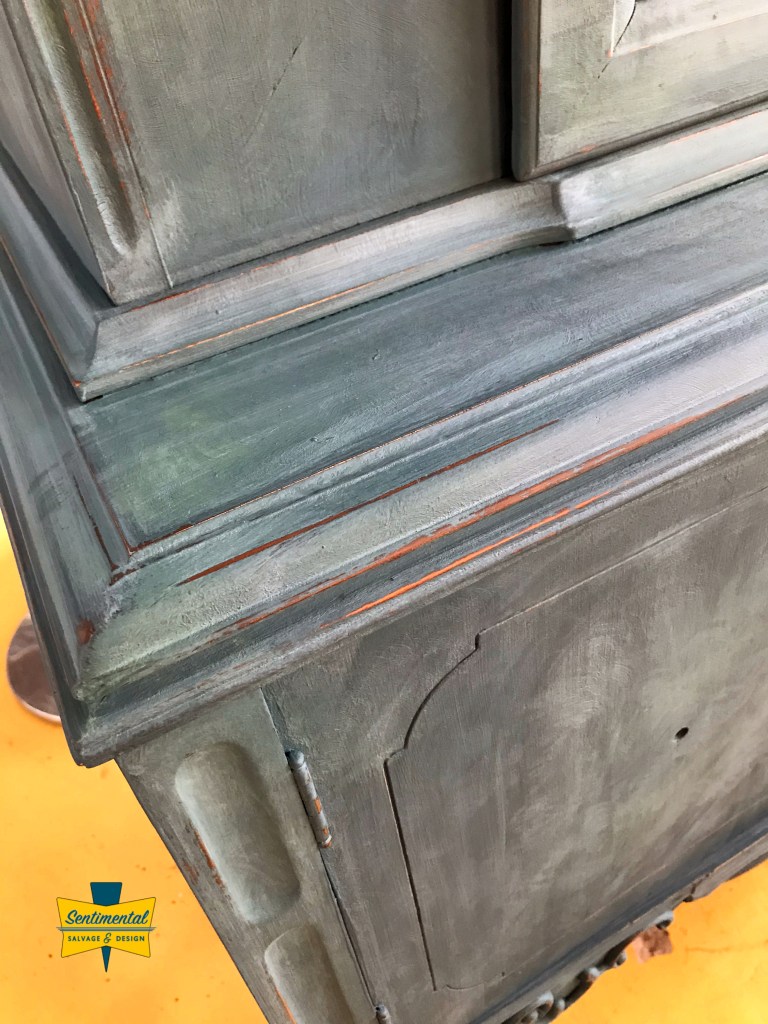
Once the clear coat sealer had dried completely, I began the process of adding more dimension using Dark & Decrepit liquid patina. Using just tiny amounts and working in only small areas at a time, I used the same swirling technique as in the painting process. I applied the shading only in certain areas. No pattern, no real plan, I just went with what I thought would look good.
The shadows created were giving her a ‘bottom of the ocean’ look but I felt like she was starting to get a little too gloomy – she needed some highlighting to brighten her up.
During a facebook live, a friend mentioned the new Pennies from Heaven copper patina and that I should add some coppery drips. I wasn’t sold on the ‘drips’ but the suggestion of the copper got me thinking… what a perfect highlight for her deep blues & greens!
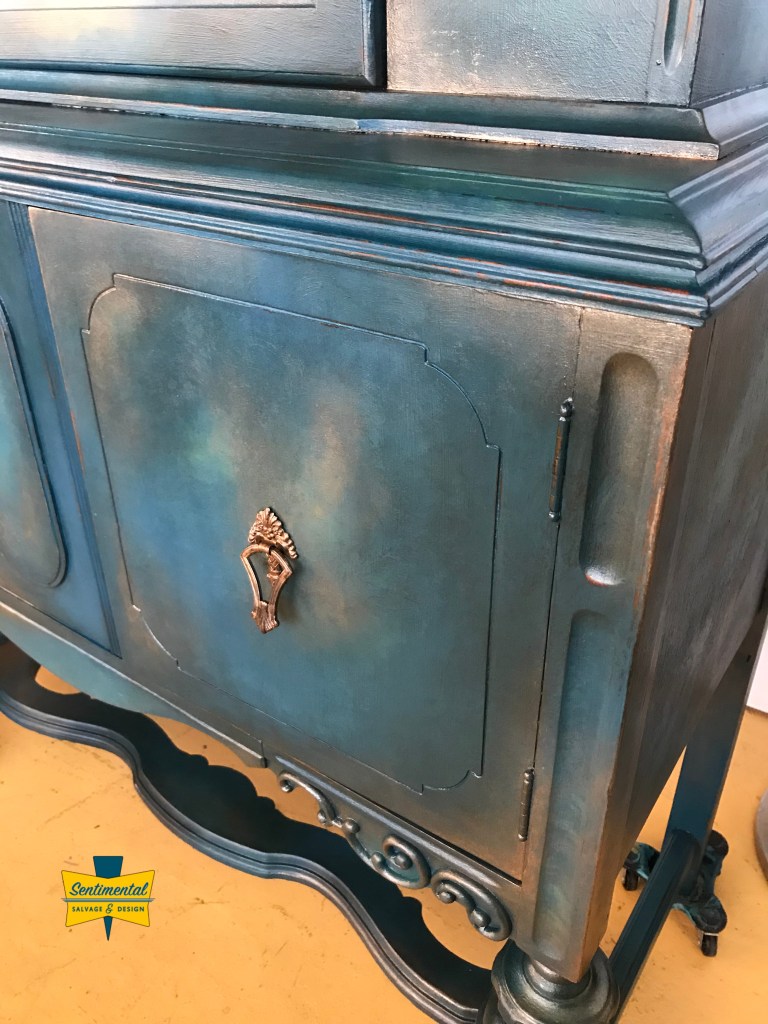
It was exactly what she needed!
The copper highlights worked perfectly. It gave her that little bit of brightness she needed to not be so gloomy but it didn’t overpower her.
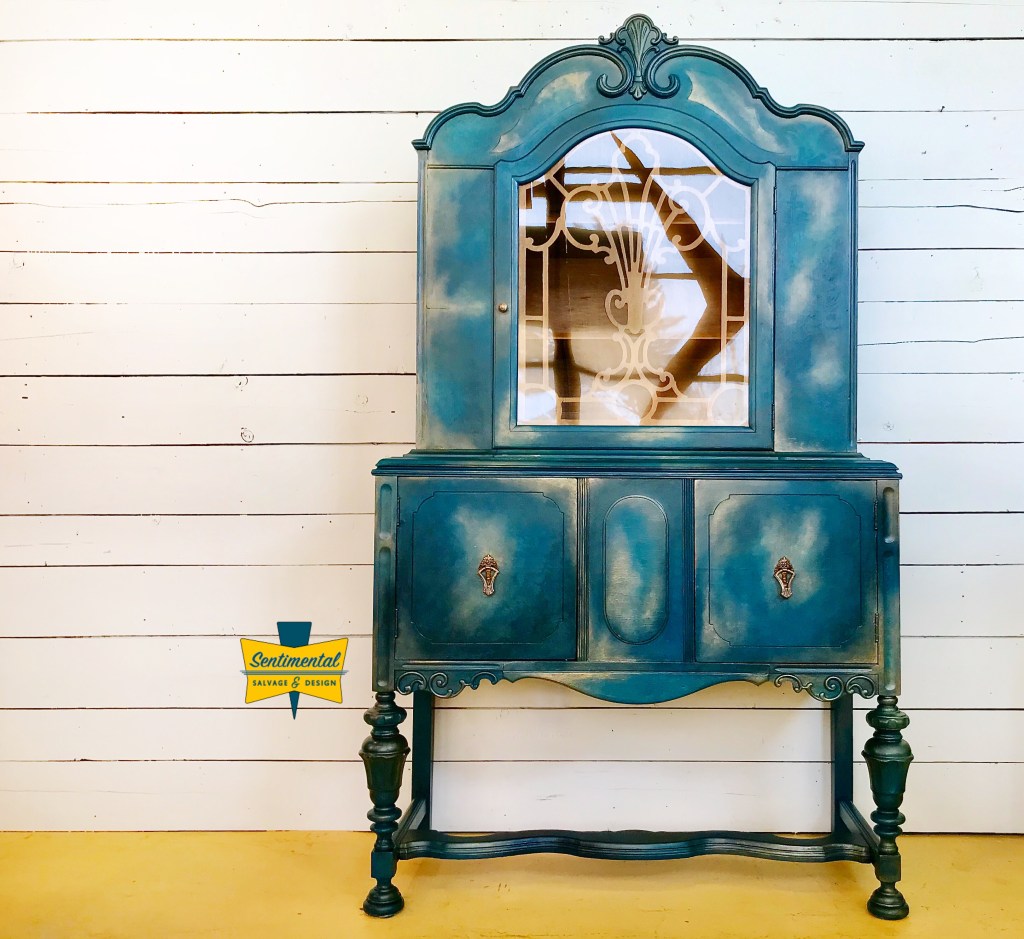
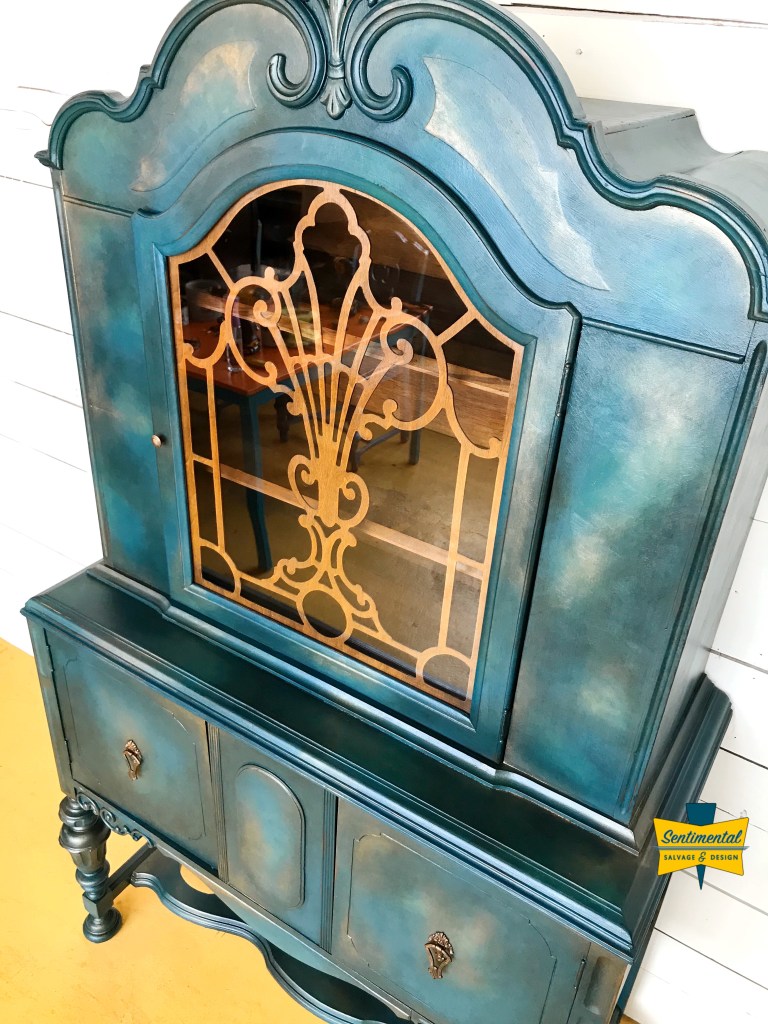
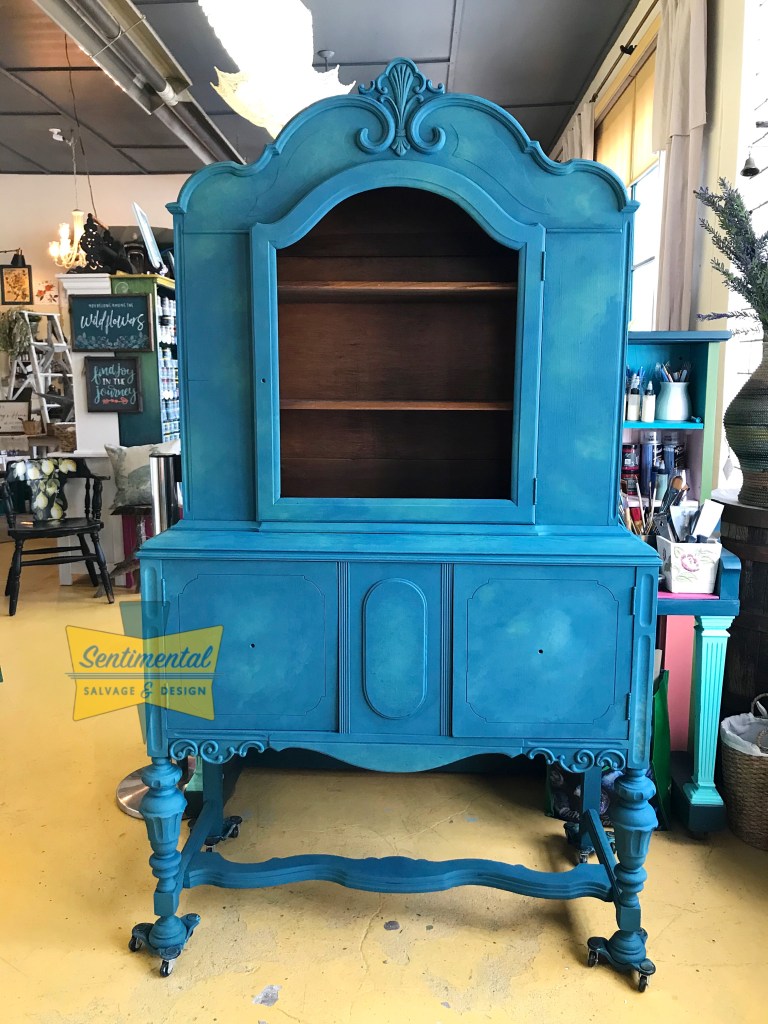
I love how she turned out. She’s probably my favourite piece to date.
She reminds me of the stormy seas so I named her Storm.
She was built somewhere around 1940 and was surely loved by whomever purchased her back then but 2019 found her needing a new home. I enjoyed the opportunity to work on a piece like her but I’m glad she’s found herself a new home where I’m sure she will be loved again. She was a fun project and she taught me a lot.
All paint products used are from DIY Paint™ and the brushes are by Paint Pixie™. All are available for purchase on my website at sentimentalsalvage.ca.
Recipe:
- Bohemian Blue
- Fancy Farmgirl
- Big Top clear coat
- Dark & Decrepit liquid patina
- Pennies from Heaven copper patina
Tools:
- Believe – #12 Oval Paint Pixie
- Dusty – Paint Pixie
- French Tip – Paint Pixie
- Lil’ Frenchie – Paint Pixie
- Mist-er Bottle
Many thanks to all of you who followed along on this project!
Now on to the next!

